
6. Description and labelling
Contents: The importance of precise descriptions/labels; guidance on implementation.
Why are descriptions and labels important?
Clear and precise descriptions and labels help to ensure clarity. Descriptions of, for example, links must be able to stand on their own outside their context and still be understandable. Among other things, this enables navigation using the Tab key.
How do you format descriptions and captions?
Generally speaking, descriptions should not refer solely to sensory characteristics, as in the phrase "In the yellow tile you will find …" (see Fig. 1). It is possible that not all students will notice these sensory characteristics, meaning that such a description may not make sense to them.
Similarly, meaningless link labels such as "more…", "continue" or "here" should not be used (see Fig. 1) – particularly if their meaning is not clear from the context.
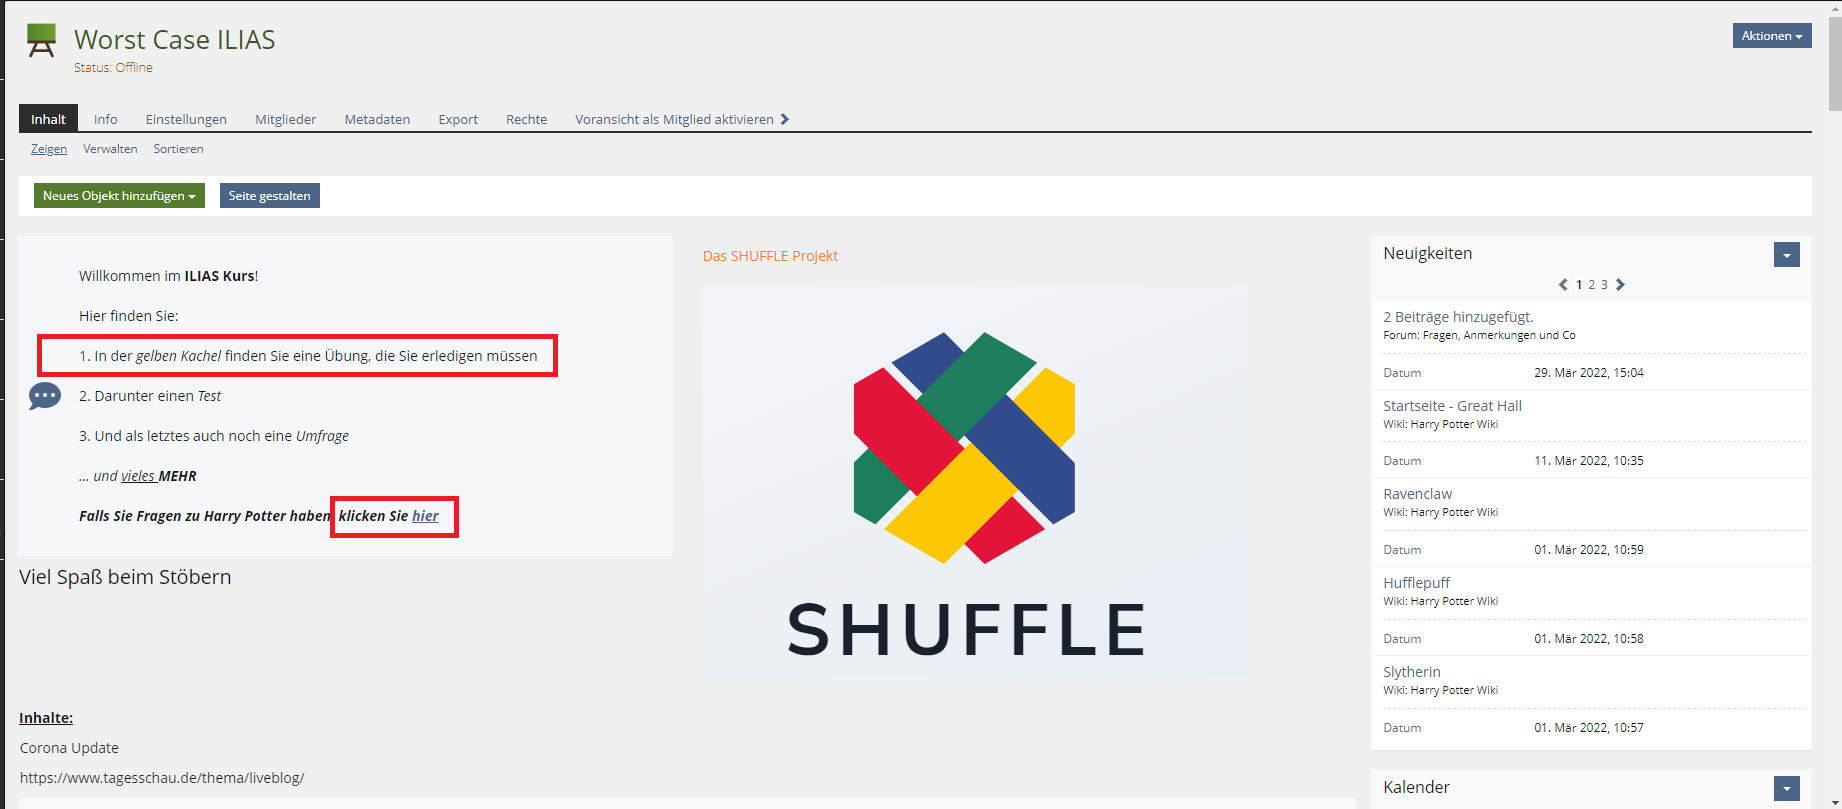 Fig. 1: Accessibility issues in the description.
It is best to include an indication in the link text of the file format behind the link, for example by adding "(PDF)".
To add an accessible label to a link, first open a text field by clicking the "Design page" button and then the plus sign. From there, select "Insert text". Click on the text field. The text editor will open.
Under "More", you will find the button for a link. When you click on it, you can choose between an external link, an internal link within ILIAS, and a link to your user profile on ILIAS (see Fig. 2).
For example, if you click on ‘external link’, a command line appears in the text field: [ xln url="http://" ] [ /xln ]
You can enter your link and the caption here.
- Insert the URL link after ‘http:’, e.g.: [ xln url="http:www.tagesschau.de//" ]
- Insert the link text between the square brackets, e.g.: [ xln url="http://" ] xxx [ /xln ], e.g. [ xln url="http://" ] Link to the Tagesschau website [ /xln ]
- Carry out both steps together so that the command line looks like this: [ xln url="http:www.tagesschau.de//" ] Link to the Tagesschau website [ /xln ]
- Make sure there are no spaces inside or between the square brackets, otherwise the URL link will not be displayed.
The link is now displayed in an accessible format (see Fig. 3). The text can be added in the same way for the other types of link.
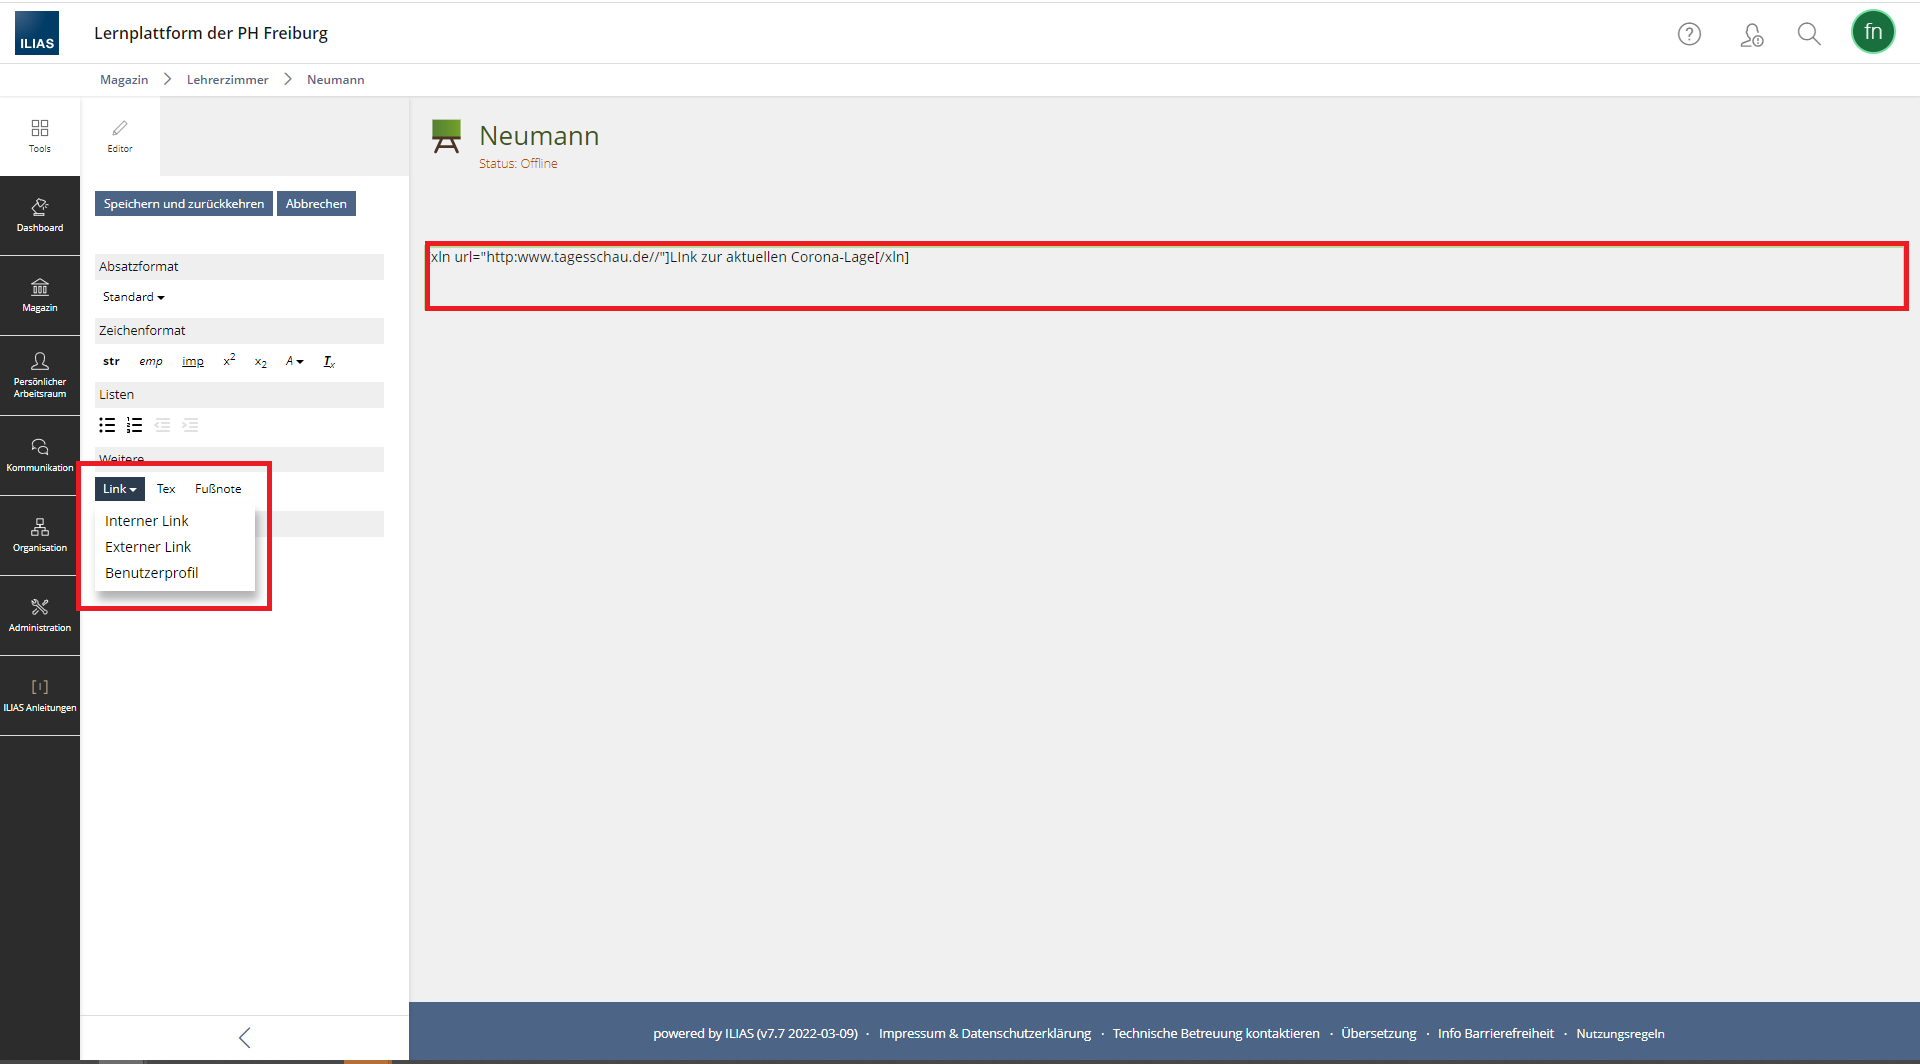
Fig. 2: Inserting a link.
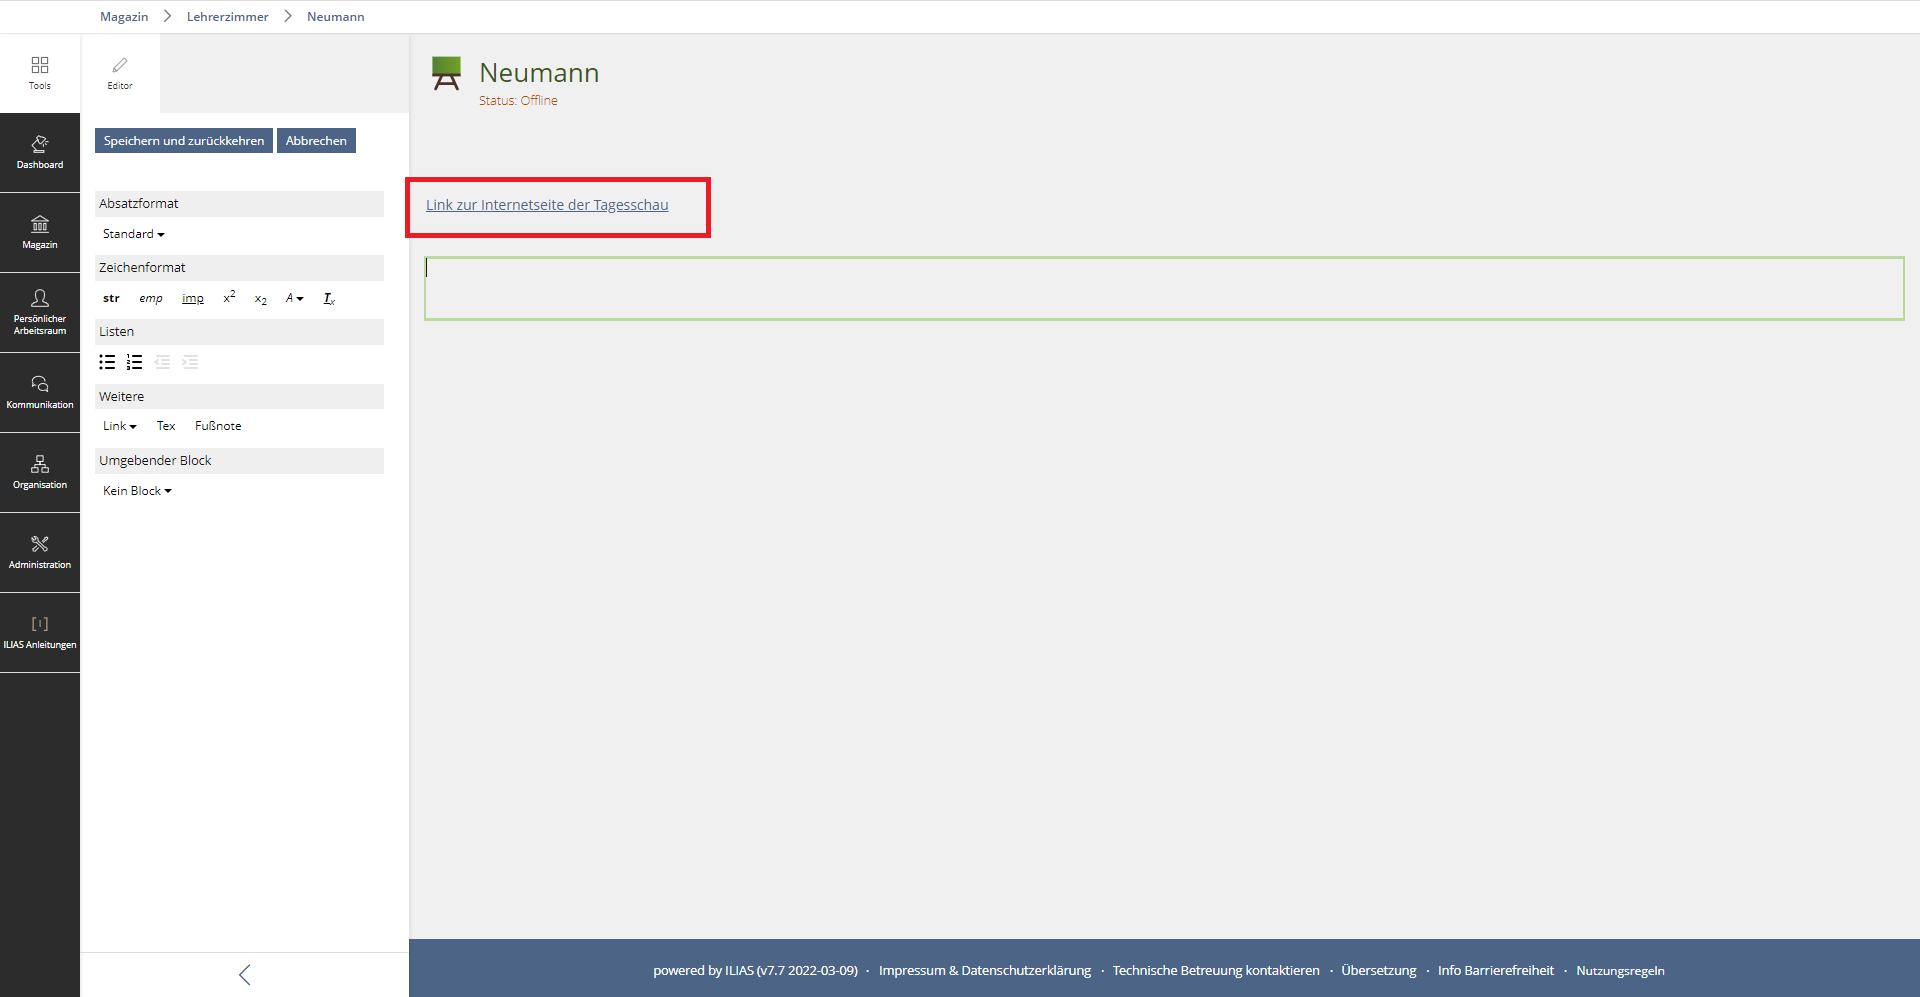 Fig. 3: A link with a descriptive caption.
Web links as objects
A web link inserted via the "Add object" button should also be labelled correctly – with both a descriptive label and a reference to the file format.
To add the web link and label it correctly, click on the "Add object" button and select "Web link" from the list (see Fig. 4). This will open the web link menu. Here you can specify whether it is a single link and whether it originates from ILIAS or not.
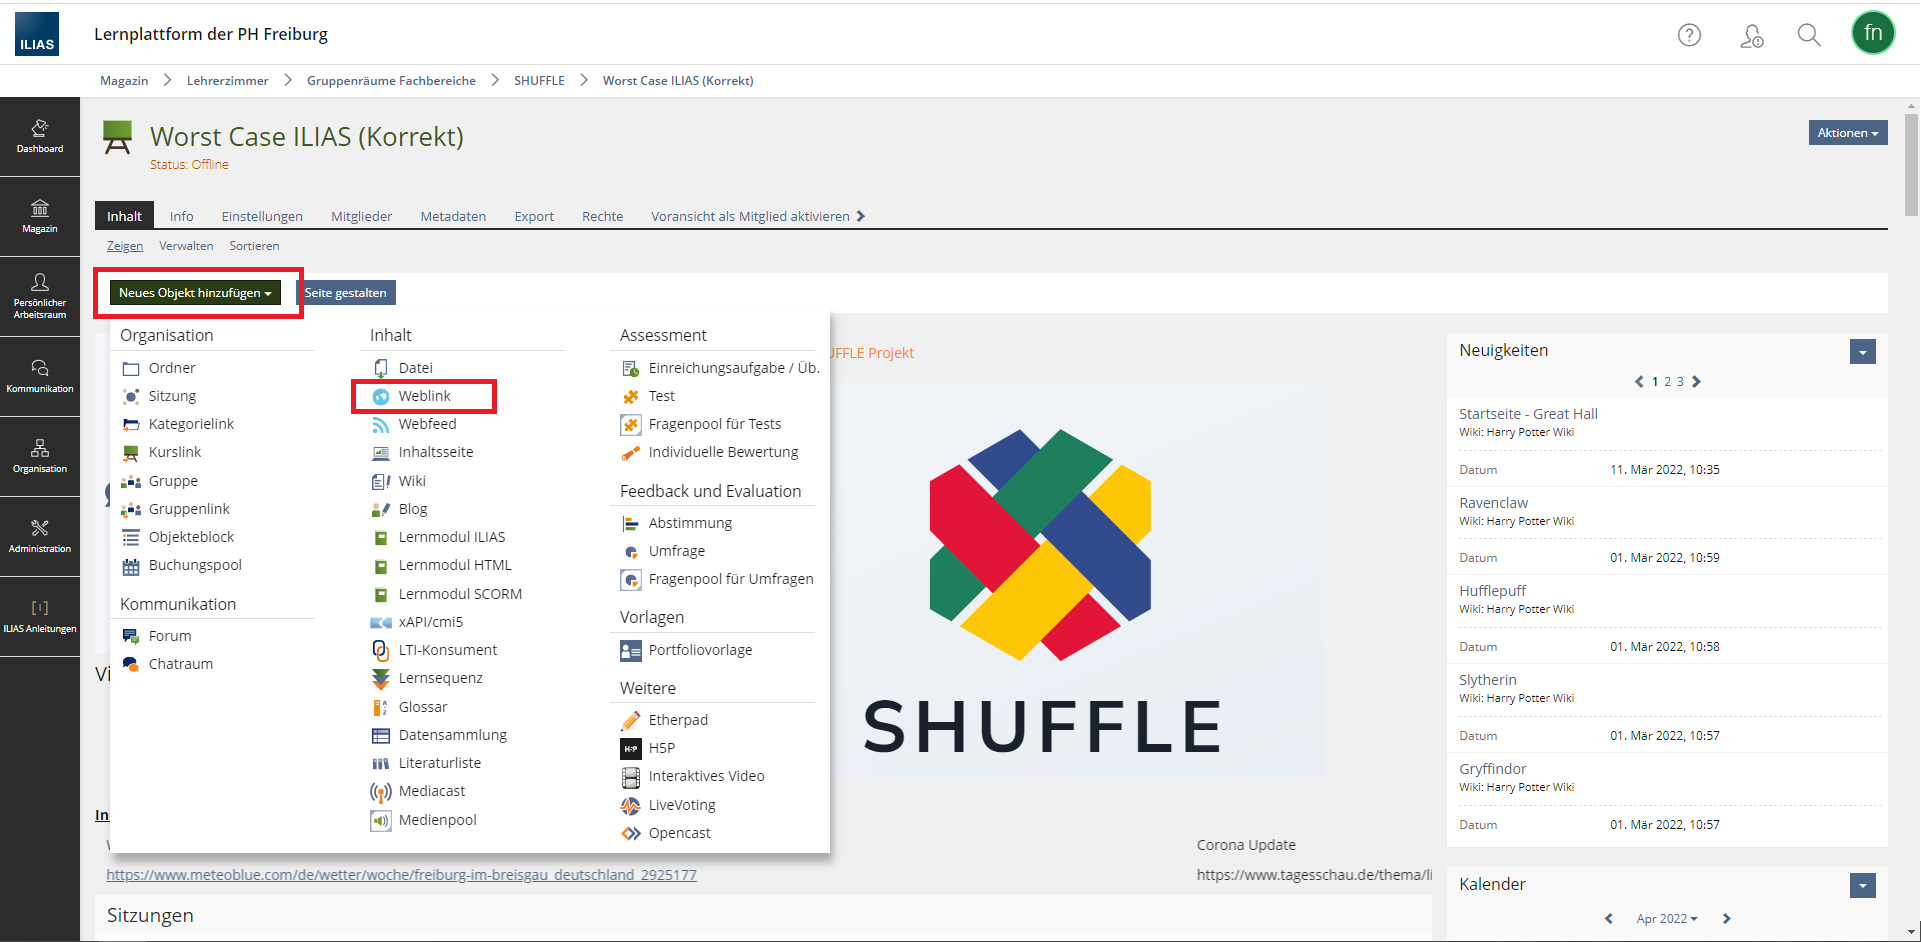 Fig. 4: Add a new object.
In the "Web link title" free-text field, you can enter a descriptive label for the link (see Fig. 5). In the "Description" field, you can add further information about the link.
Click "Save" and the link will appear in your course room.
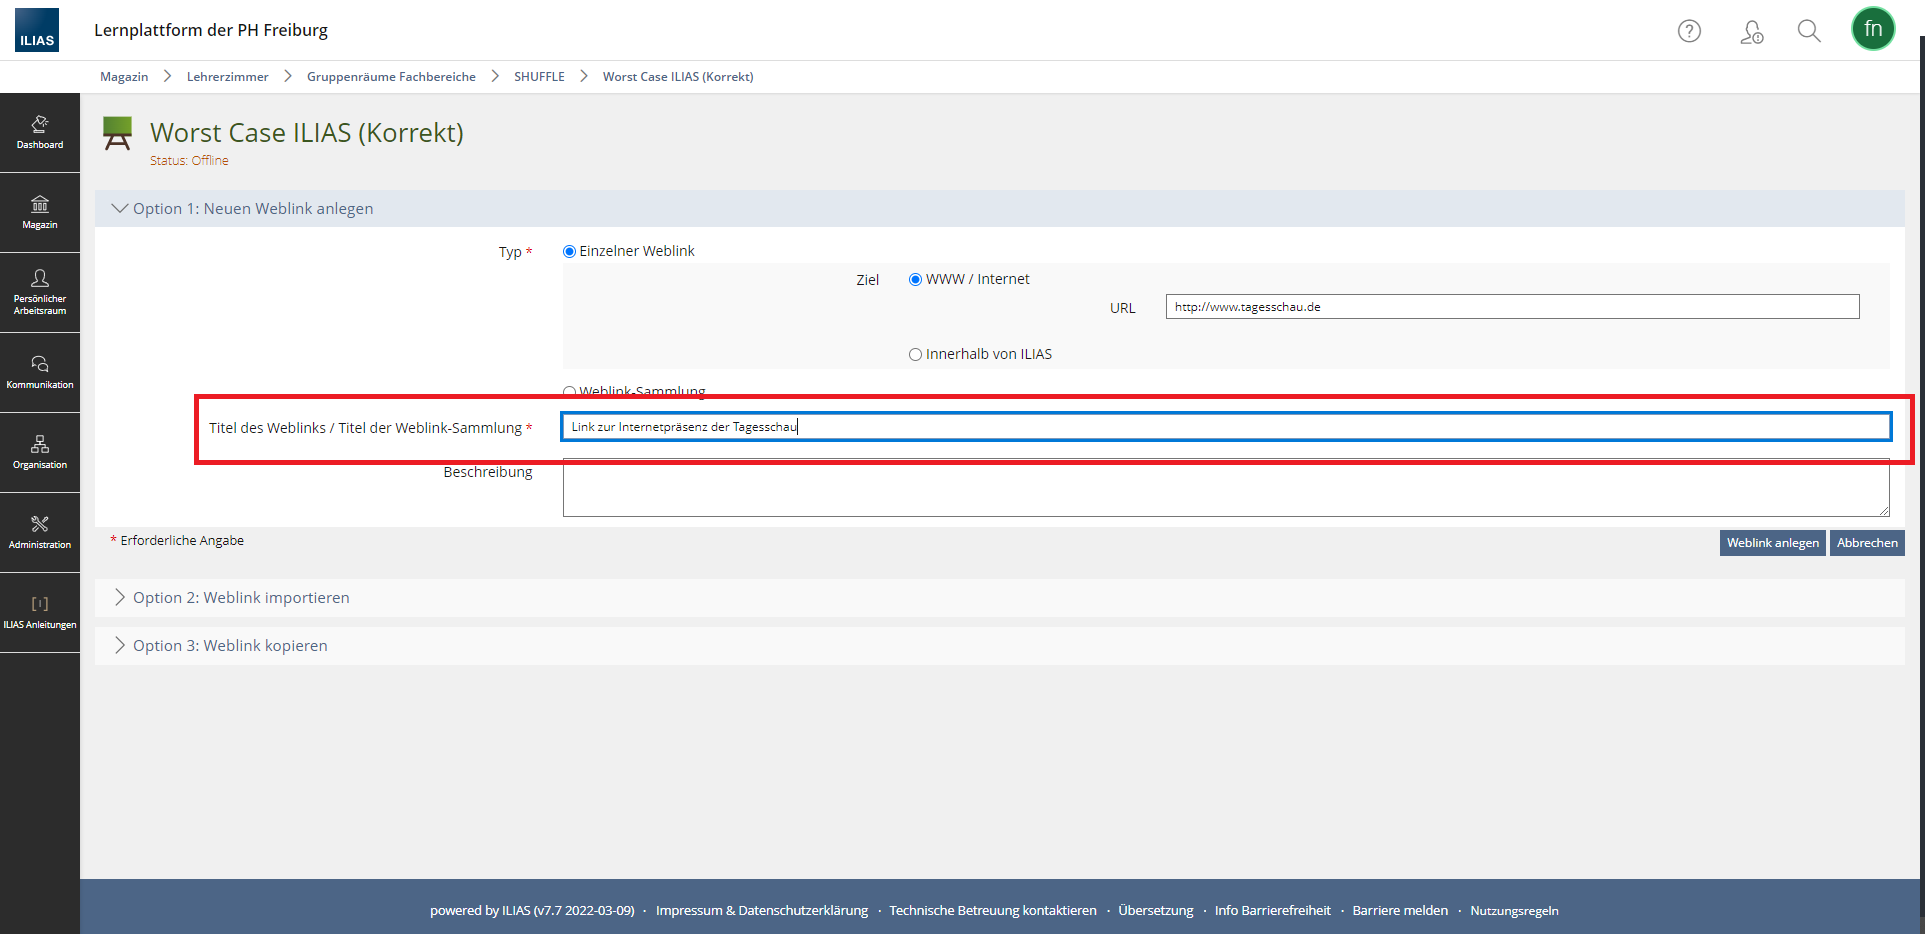 Fig. 5: Web link menu.
No comments to display
No comments to display